During 2020, as many others will have done, I have spent an awful lot of time in front of the computer, a lot with various online teaching, training, meetings and talks (local history). I have used my built in webcam for this, whilst the webcam was not the best image quality, for my use it was acceptable; I was screen sharing a lot so the webcam was less of a priority than audio. For the audio kit, I was already using a Boya BY-M1 and a Neewer NW-7000. Again not pro grade equipment was a vast improvement on the built in microphone.
Towards the end of 2020 I decided it was time to upgrade the webcam itself. I already have a DSLR and studio lighting. I could just use them but the biggest problem was the space it all takes up, I would need a larger room and desk and to keep setting it up and taking it down, well not an option.
So a simple, desk based solution was needed. Simple, a new webcam, right? Wrong! I purchased one mid priced webcam but had to send it back (the colour was completely washed out, the field of view was also much larger than advertised). So I got another webcam, I thought I’d go high end (costly) this time, but found the autofocus only locked on to my top (clothes) and not my face, so it too got sent back. I tried to use my phone as a webcam as well after hearing many say how good it was. I even tried a dirt cheap eBay webcam, which unsurprisingly didn’t work at all. All of these were advertised as high quality 1080p cameras and gave far from the performance of my built in 720p camera.
As a side note, one of the simplest and easiest way to improve the video from a webcam, in my opinion, is to get good lighting. It is not always easy, especially if you have little space and/or budget. I do have two large softboxes, which I can use depending on where I am. But for my desk set-up I have gone budget, which is a must under the current climate.
Build a webcam!
So where next? Build one of course, with a Raspberry Pi! I stumbled on this Youtube video showing showmewebcam which allows you to take your Raspberry Pi Zero and turn it into a plug and play webcam. Basically you take a Raspberry Pi Zero, add a camera module to it and make an SD Card from the image on the site. Source code is all available so you can change and compile it all yourself. Once the SD card is made, it goes in the Raspberry Pi, you plug a USB lead in the data port, wait a few seconds and it will appear as a webcam in your system. Some people have said it doesn’t work with certain apps but so far with Quicktime, Zoom and a few others I have not had an issue.

What I used for this is:
- 1x Raspberry Pi Zero (doesn’t matter which one)
- 1x HQ Camera module, and lens.
- 1x Mini SD card
- 1x USB cable
- 1x Case (optional)
I have tested it with an older 2MP camera module and it worked fine, but I decided to go for the HQ Camera Module and lens, purchased from Pimoroni. These were expensive and okay it is manual focus, the quality is far superior to any of the other webcams and I have a lot more control.
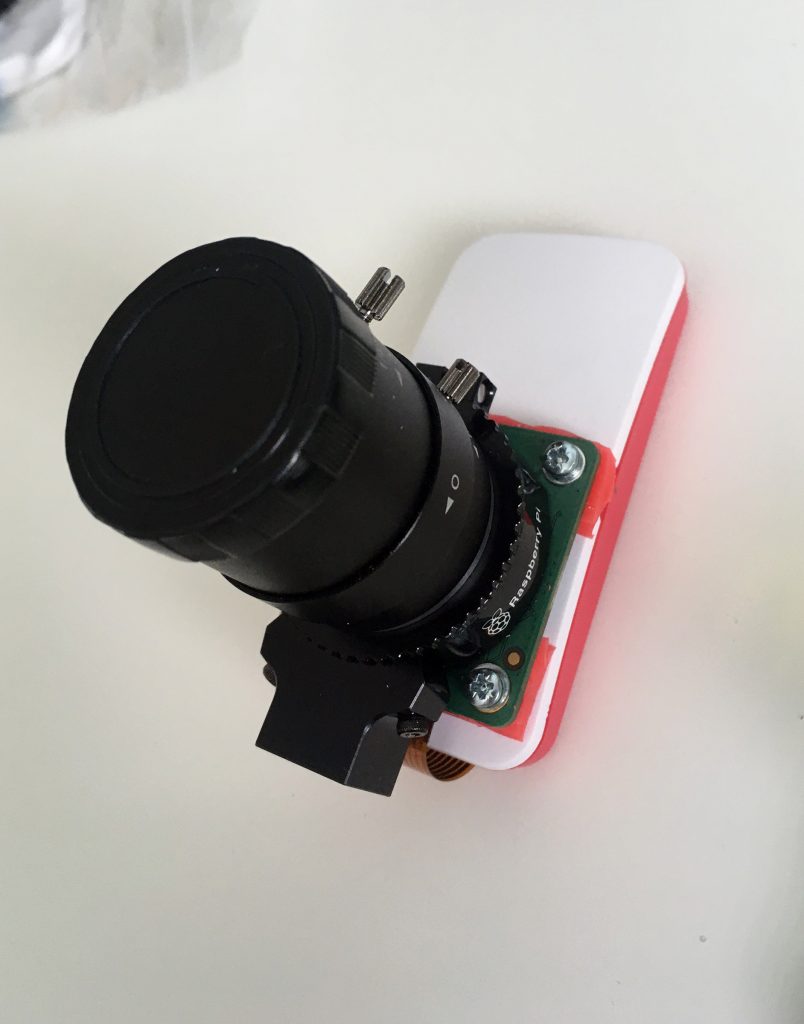
The HQ Camera Module connected to the Raspberry Pi Zero. The HQ Camera mounted to the case. All mounted on a bracket.
The Raspberry Pi Zero was put in a case with a short cable to connect it to the HQ Camera Module. Be sure to download the ISO and create your SD Card before putting it all together. I used some small screws and rubber spacers to mount the camera module to the case. It doesn’t look good but it works. The camera module comes with a mount so I was left with a some options on how to mount it.
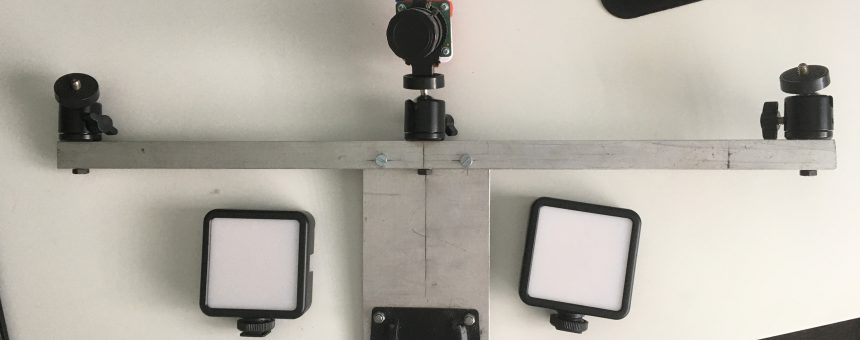
I took an old VESA mount flipped it back to front and upside down (the bit that usually screws into the wall I have screwed into my monitor, and with it upside down makes a simple way to attach something to the back of the monitor. Using this and a few pieces of Aluminium, I was able to create a basic mount (see photograph above). I placed three ball mounts on this and then the camera along with two VLIM VL-81 lights on these. As you can see, doesn’t look pretty but it works with the camera and lights just above the top of the monitor. There is more lighting than these two.

Summary
The quality of the video at 720p and 1080p is excellent especially with the lighting – I will upload samples soon. Okay so it is not professional quality/DSLR quality, but it is compact and fits on the desk. There is no microphone or autofocus but I was already using external microphones anyway (lipsync is not an issue) and I can set the aperture to allow me movement whilst staying in focus so neither really an issue.


